
Put the checked contact where you work
If you organise your work in Notion, keep the person’s details there too. NexHello handles the scan and review on your phone. Your chosen send starts a Zap, Zapier’s name for a workflow: a series of steps connecting your tools.
Business card → checked NexHello contact → chosen send → Zapier → Notion contact record
This example receives the contact, searches Notion for its NexHello contact ID, creates a record if needed and updates its properties. It is a starting point you configure and test in your own accounts. There is no downloadable Zap or Notion database with this guide.
Your contacts, notes and follow-ups stay on your phone by default. You choose which contact to send, when to send it and which system receives it. That send transfers the contact and saved activity to Zapier. Your workflow decides what reaches Notion. Card images are not included. Set access permissions in both services for the people who need the information.
What you need
- NexHello access, with system connections enabled.
- A paid Zapier plan with Webhooks by Zapier and the steps you need.
- A Notion account and permission to connect the destination database to Zapier.
- Internet for sending and a fictional saved contact for testing.
As checked on 23 October 2026, Zapier lists Webhooks on Professional, Team and Enterprise plans. Check current features and charges before choosing a plan. Notion connection instructions explain how to grant Zapier access to the pages or databases you need.
The walkthrough is provided as-is. You are responsible for completing the setup, testing it and making it ready for everyday use with real contacts. App subscriptions, platform accounts and usage costs are separate. Talk to Naonis if you would like paid help with setup or a custom workflow.
1. Prepare your Notion contact table
Create a Notion database for your contacts. The example calls it NexHello Contacts. Zapier calls the table it works with a data source, and a record in it an item.
The screenshot shows these properties: NexHello Contact ID, First Name, Last Name, Company, Job title, Primary email, Primary phone, LinkedIn, Website, About this person, Address, Original text type and Original text. Original text is hidden from this table view; that does not remove it from the record.
Use suitable property types for the information: email for the primary email, phone for the primary phone, URLs for website and LinkedIn, and text for the other details. First Name is the title property in this example. Keep a dedicated NexHello Contact ID property so repeated sends can find the same record.
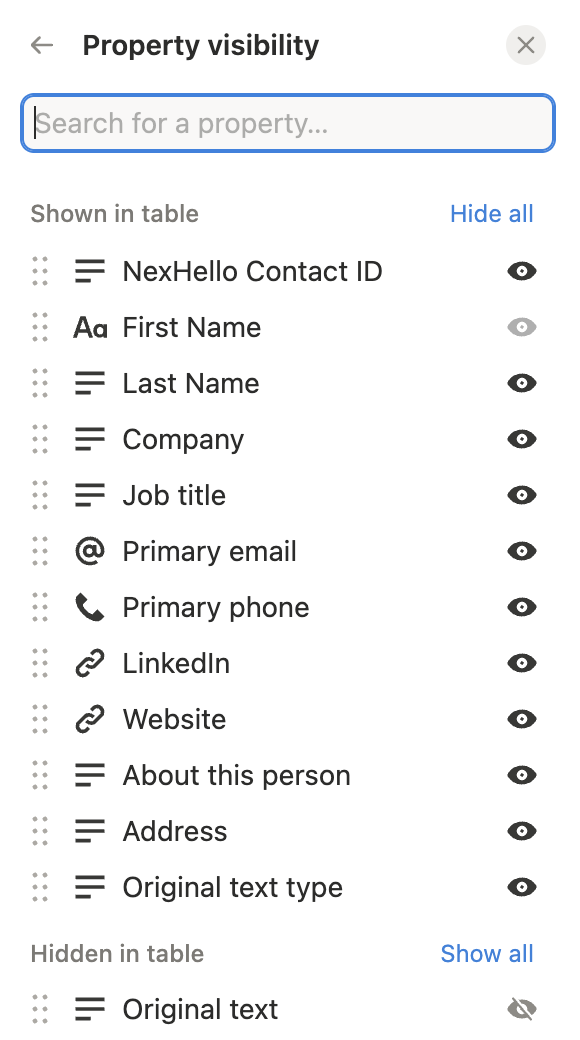
Connect Notion in Zapier and grant access to this database. If it does not appear when selecting a data source, check those permissions before mapping fields.
2. Receive a contact in Zapier
Create a Zap. Select Webhooks by Zapier as the trigger app and Catch Hook as the trigger event.
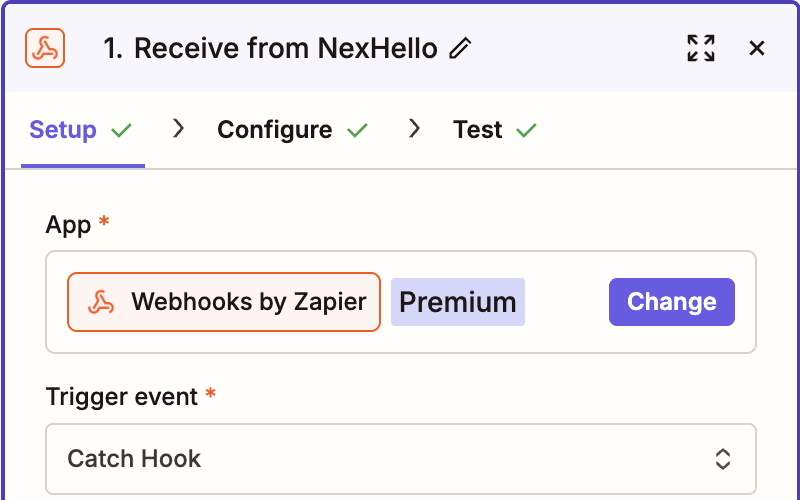
Copy the generated webhook URL into NexHello using the shared connection setup instructions. A standard Catch Hook uses its private URL rather than a separate password, so choose No authentication for that setup. Treat the URL like a password and keep it private, as Zapier recommends.
Send a fictional saved contact from NexHello, then load that request in Zapier’s trigger test. Use this contact sample for your field mappings.
NexHello’s connection test is different: it sends webhook.test without a contact. Before enabling the finished Zap, add a check before the Notion steps so only contact.activity.recorded requests with a non-empty contact ID continue. This guard is an extra setup step beyond the pictured flow. A connection test should not create a blank Notion record.
3. Find the contact or create it
Add the Notion search step shown as Find Data Source Items or Create. Choose your contact data source and search NexHello Contact ID using equals.
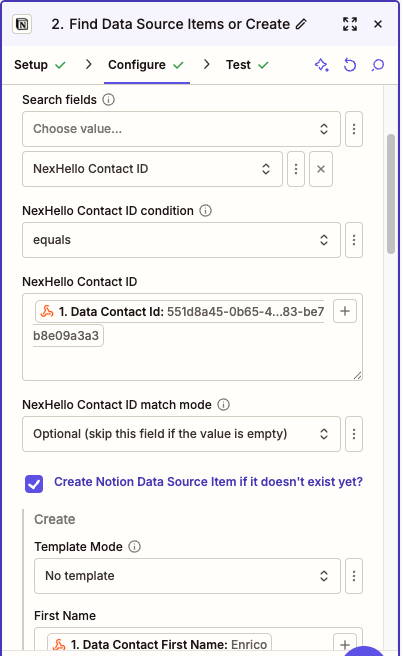
Map Data Contact Id from the Webhooks by Zapier trigger into the search value, as shown above. This is data.contact.id in NexHello’s request: the ID of the saved contact. Use that same field when creating the Notion record, so a later send can find it again. Check it against your own trigger sample.
Enable Create Notion Data Source Item if it doesn’t exist yet?. Map the incoming contact ID into the new item’s NexHello Contact ID property, along with the contact fields you need. If the ID is not saved on creation, the next search cannot use it to find that record.
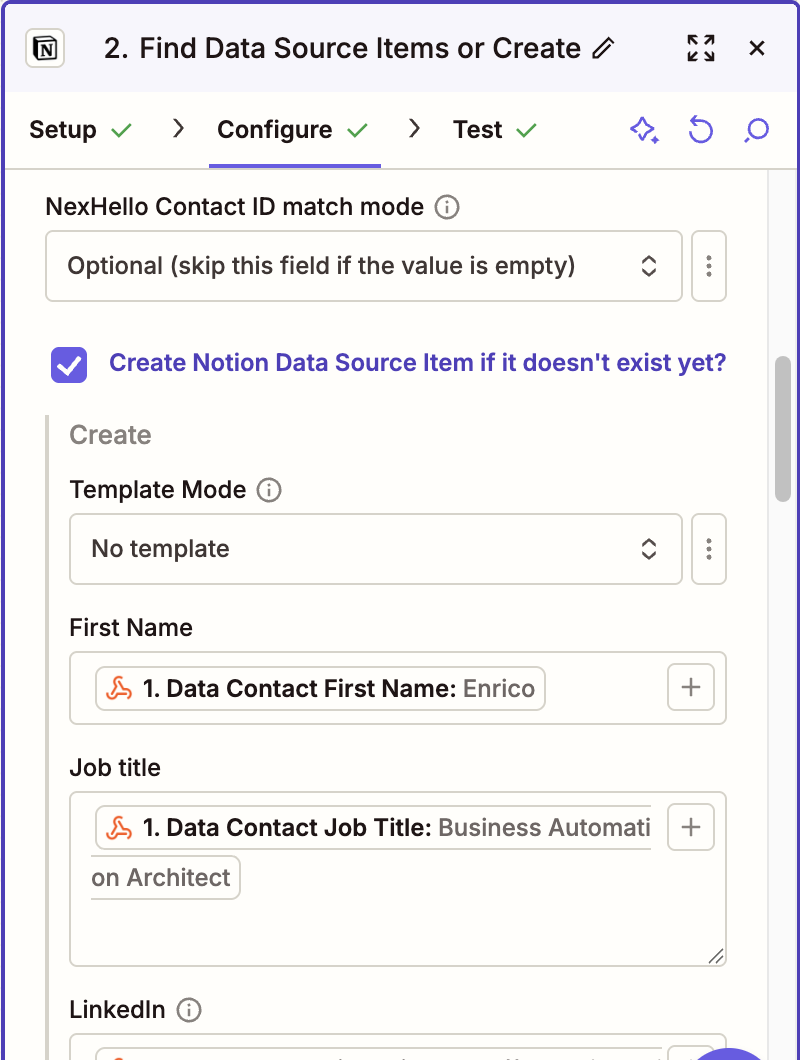
The screenshot shows Optional (skip this field if the value is empty) for the ID search. Keep the earlier non-empty ID check so an empty search value cannot reach this step. Use Required for the ID match if available in your setup.
Map contact properties from data.contact, such as first_name, last_name, company, job_title, email, phone, linkedin, website, address and about_this_person. Primary contact values identify one saved entry; see the shared data reference if you need every phone number or email address. Original source text, when available, is in raw.payload, with its type in raw.payload_type.
4. Update the returned Notion item
The pictured Zap uses Paths, which split a workflow according to rules. Its path is labelled Existing record to update. The visible condition is simply that the Notion step’s returned ID Exists.
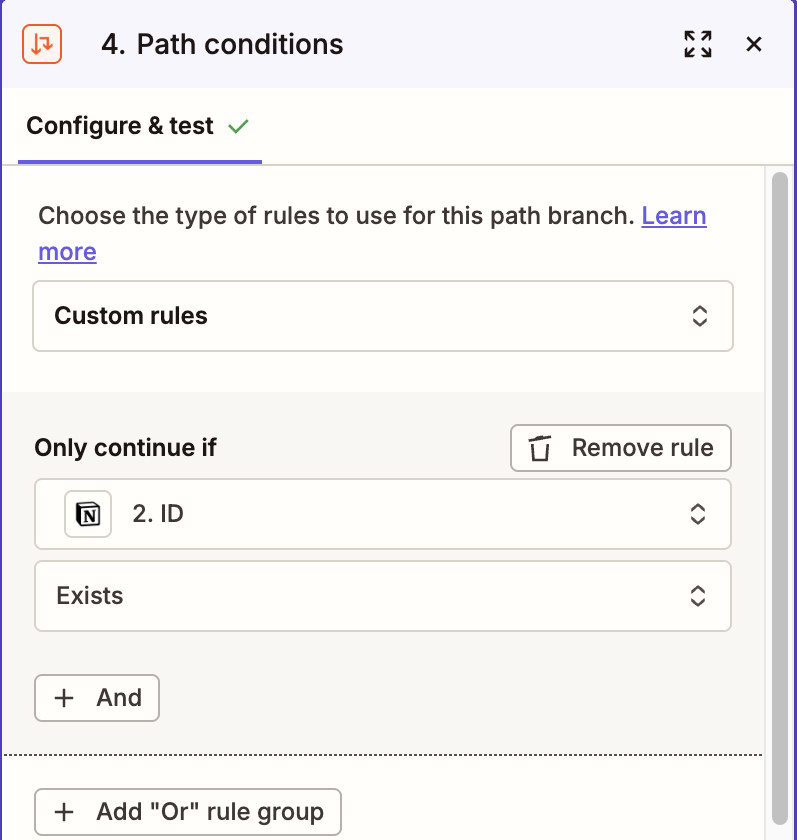
An ID can also be returned after creating a new item. This condition alone does not prove the record existed before the Zap ran. Test both a new contact and an existing one.
Add Update Data Source Item, select the same data source and map Item to the ID returned by the Notion search/create step. This is Notion’s item ID, not the NexHello contact ID used for matching.
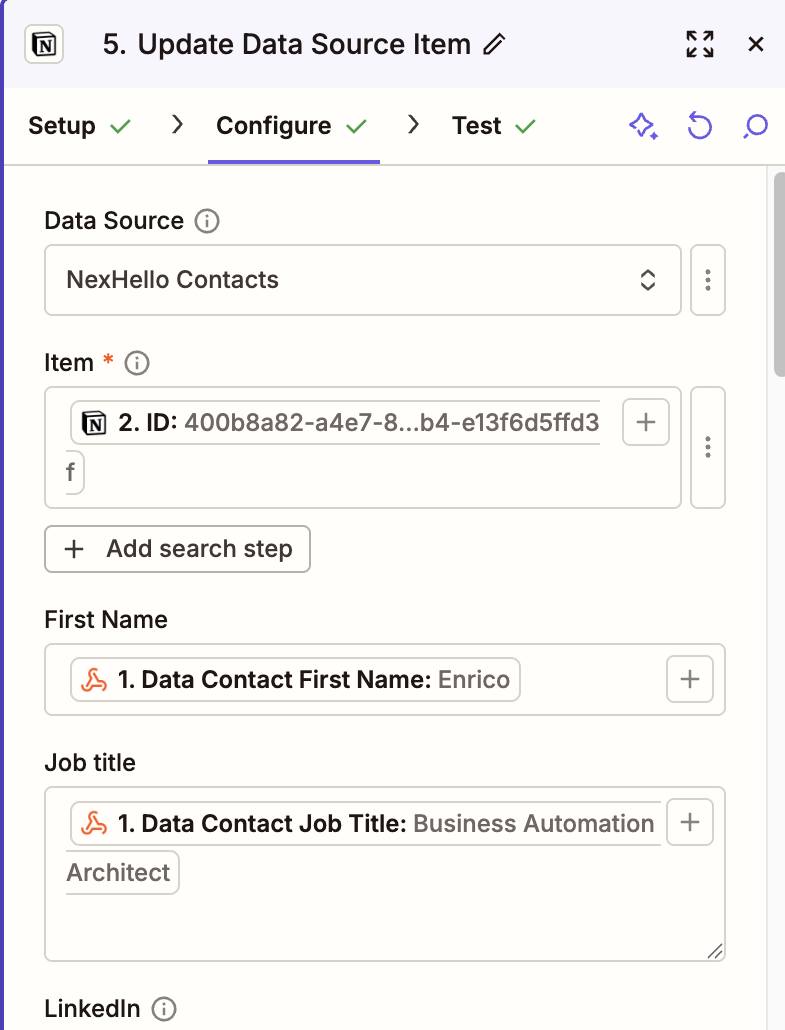
Map the contact fields again for updates. The screenshot shows First Name and Job title, with LinkedIn below. Check every property you want to maintain, and decide whether an empty incoming value should clear a value already in Notion.
5. Test the result before using real contacts
- Send a fictional contact and check the Zap run and new Notion record.
- Change that contact in NexHello and send it again. Confirm the intended fields change on the same record.
- Confirm the record stores the NexHello contact ID and that another send does not add an unwanted row.
- Run the connection-only test and check that it creates no contact record.
- Test missing fields and empty values. Check failed runs and permissions before enabling the Zap for everyday use.
The example below shows a contact row in NexHello Contacts, with its NexHello contact ID and mapped details. Check your own row against the contact you sent. Open the image at full size to read the columns.

A webhook reply confirms receipt, not completion of the Notion steps. Check Zap history and the actual Notion record. See the common reply rules for what NexHello’s sent status means. The shown Zap has no custom response step; do not assume its Notion errors appear in NexHello.
Matching by contact ID helps with repeated sends of the same saved contact. It does not merge separately saved contacts that happen to share an email or name. Additional matching rules, follow-up records, activity history and other destinations need their own design. Ask Naonis about a custom implementation based on what your team needs to happen next.
Other ways to start
Prefer an importable starting file? Compare the Make receiver, n8n Google Sheets workflow and Workato example. For your own destination, use the shared connection guide or workflow setup prompt.
Zapier does support JSON workflow import/export on Team and Enterprise plans. This guide supplies screenshots rather than a workflow file or a Notion database to import.
Common questions
Is there a Zap or Notion database to download?
This is a screenshot walkthrough. Build the Zap and Notion database in your own accounts. There is no downloadable workflow or database included.
Do I need a paid Zapier plan?
Yes. Webhooks by Zapier is available on Professional, Team and Enterprise plans. Check current pricing and the features your workflow needs before starting. NexHello and any Notion costs are separate.
Does sending the same contact create a duplicate?
Configure the search to match the saved NexHello contact ID, then update the returned Notion item. Test sending the same contact twice. Separately saved NexHello contacts have different IDs, even when they describe the same person.
Does this example save my full follow-up history in Notion?
The illustrated mappings cover contact properties. NexHello sends saved activity too, but storing notes, follow-up actions and their history needs additional mappings and steps. Talk to Naonis about a custom implementation.